Back to Help Center
Help CenterAccount & Security
How do I turn two-factor authentication on or off?
3 min readSettings > Security (web dashboard)
Turn it on or off from Settings > Security on the web dashboard, on any plan. You need your current password and an authenticator app on your phone, such as Google Authenticator or Authy. Once it is on, every sign-in asks for the 6-digit code from that app.
Steps
Turn 2FA on
- Open Settings, then Security.
- Find the Two-Factor Authentication section, "Add an extra layer of security to your account using an authenticator app".
- Wait for "Checking 2FA status..." to finish. When it is off you see "Two-factor authentication is not enabled" and "Enable 2FA to add an extra layer of security".
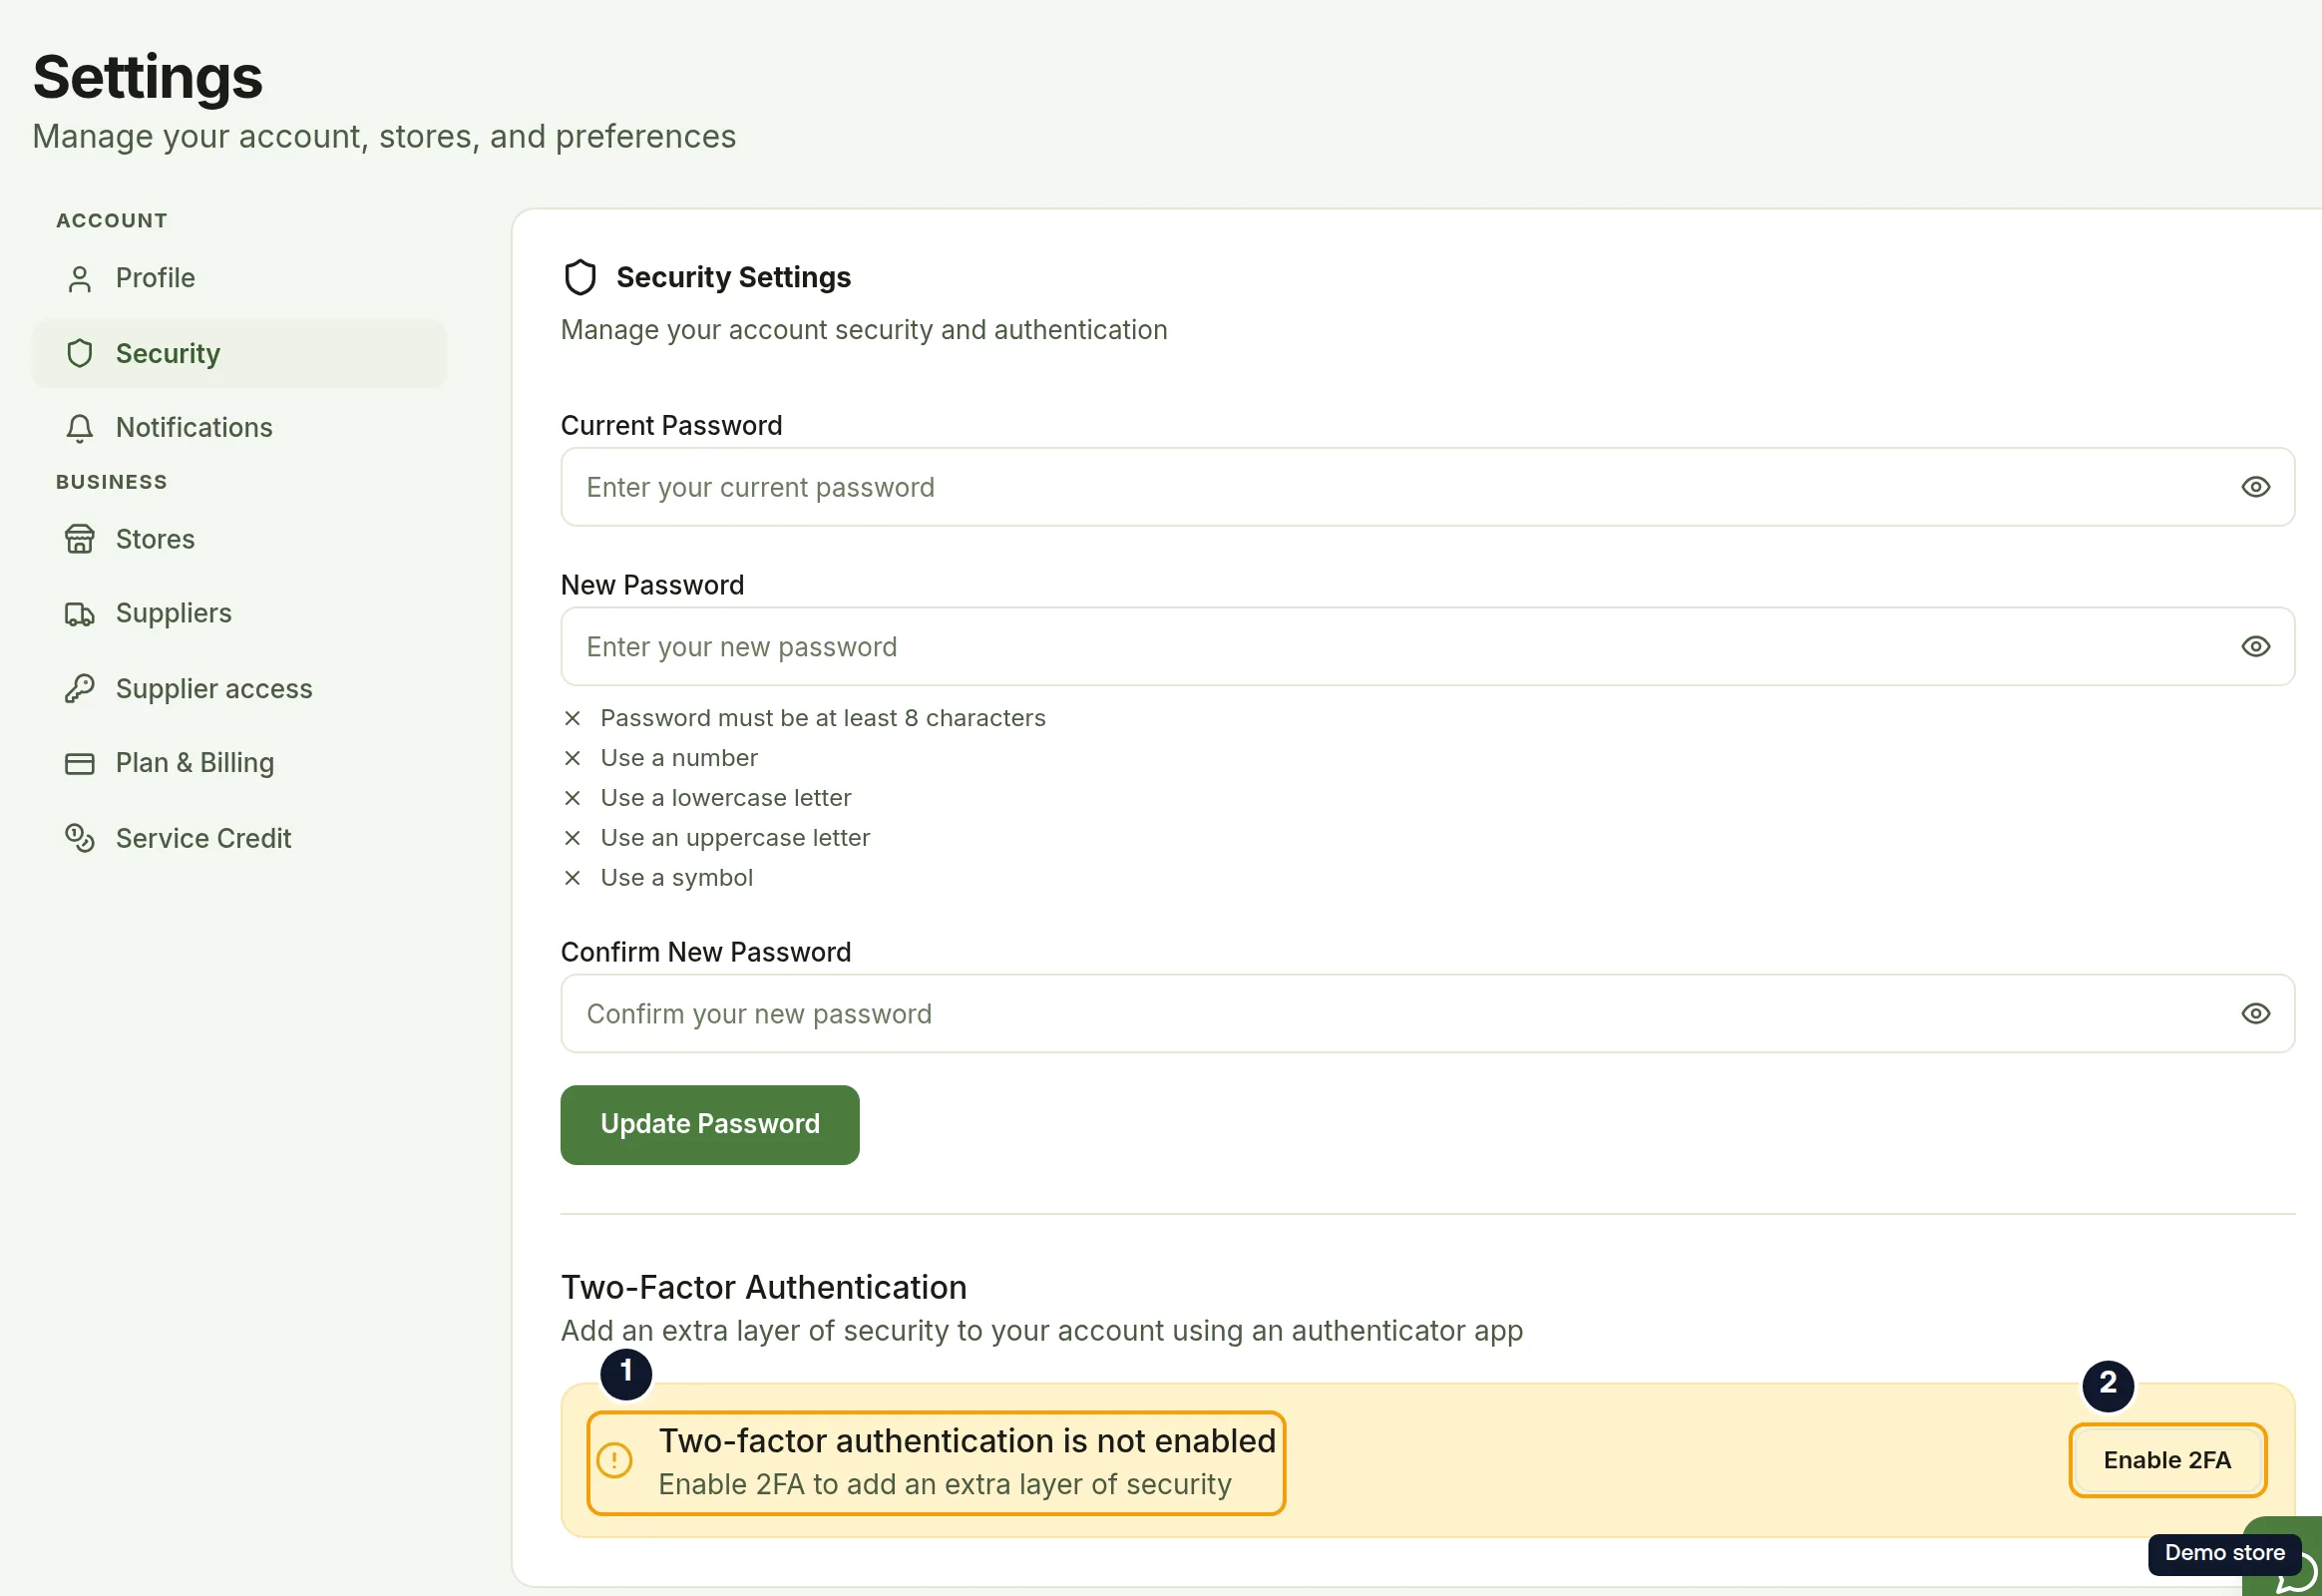
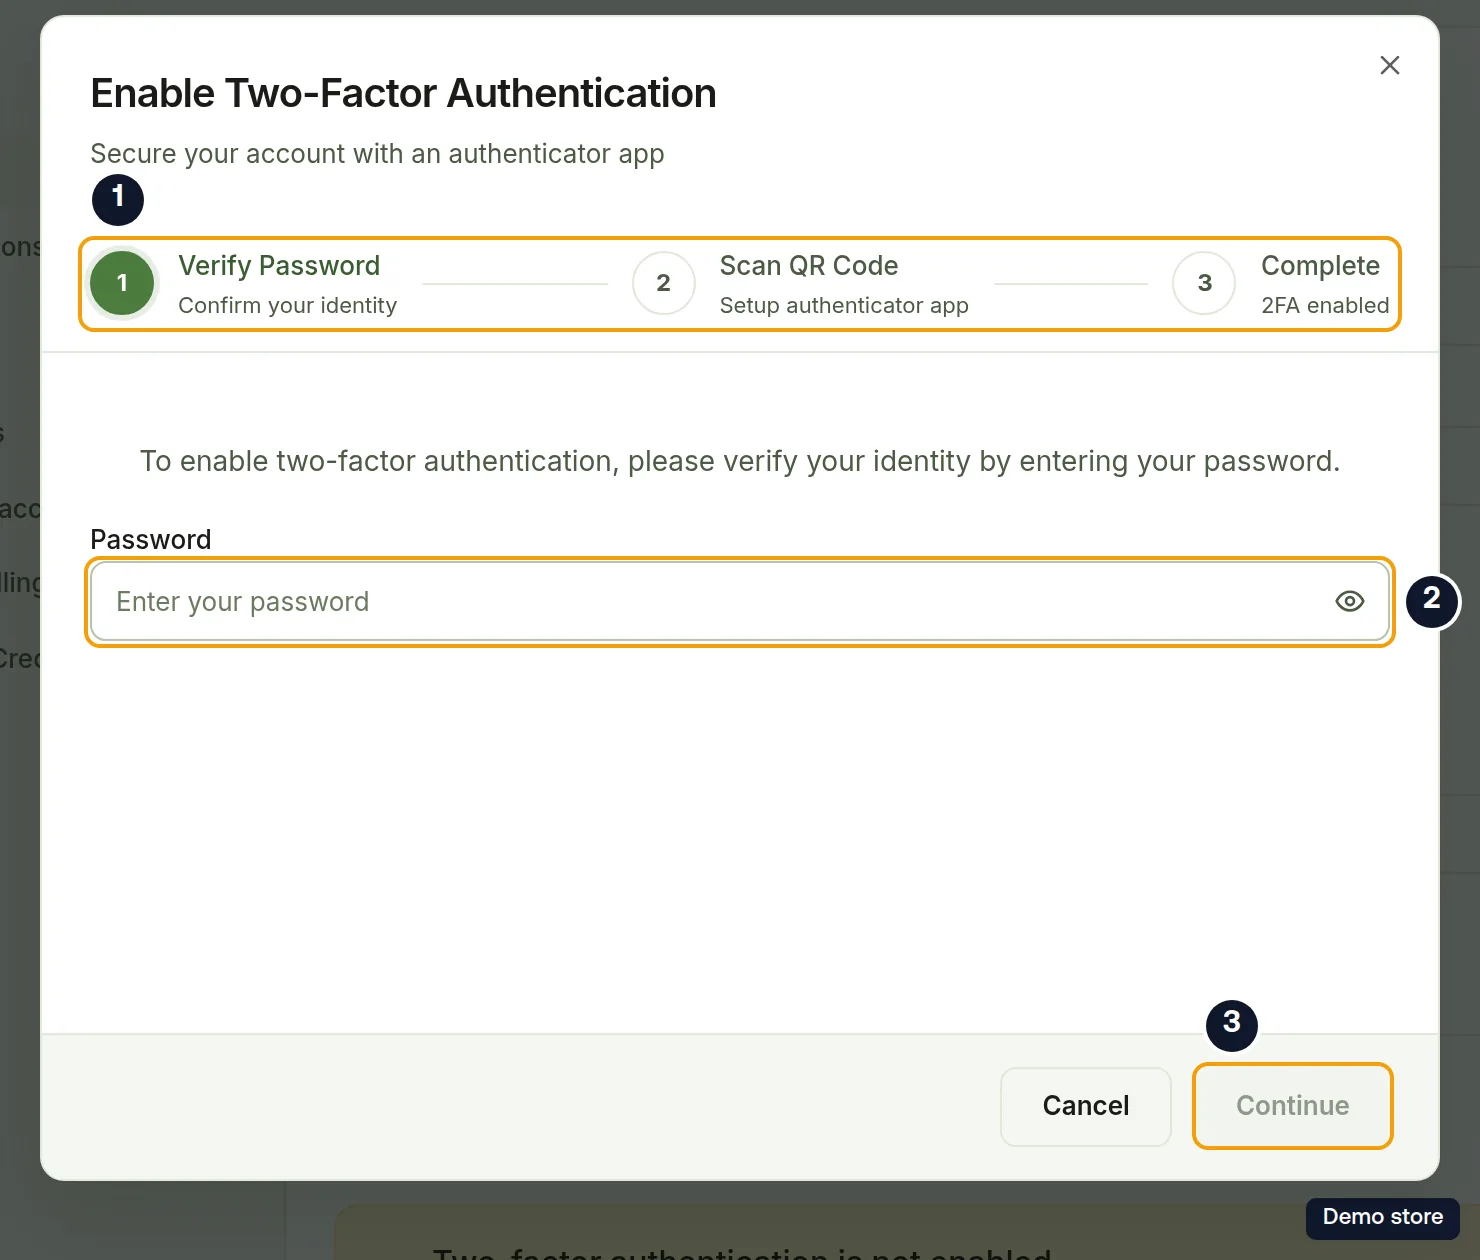
- Click Enable 2FA. The dialog Enable Two-Factor Authentication opens with the steps Verify Password, Scan QR Code and Complete.
- In Password, type your current password.
- Click Continue. The button reads Verifying... while it checks. You see "QR code generated! Scan it with your authenticator app."
- Open your authenticator app and scan the QR code under "Scan this QR code with your authenticator app (Google Authenticator, Authy, etc.)". If you cannot scan, use the code under "Can't scan? Enter this code manually:". The app names the entry DS-Mate with your account email.
- In Enter verification code, type the 6-digit code the app shows. The helper text reads "Enter the 6-digit code from your authenticator app".
- Click Verify & Enable. It stays greyed out until all 6 digits are in.
- You see "Two-factor authentication has been enabled!" and the dialog shows 2FA Successfully Enabled! with "Your account is now protected with two-factor authentication". Click Done, or wait, as the dialog closes on its own after 2 seconds.
- The section now reads "Two-factor authentication is enabled" and "Your account is protected with an authenticator app", with a Disable 2FA button.
What happens at your next sign-in
- After your email and password, you see the Two-factor verification screen with "Enter the 6-digit code from your authenticator app".
- Type the code. It is checked as soon as the sixth digit is in, or you can click Verify. Back to sign in takes you back to the sign-in form.
Turn 2FA off
- In the Two-Factor Authentication section, click Disable 2FA.
- The dialog Disable Two-Factor Authentication? explains "This will remove the extra layer of security from your account. Please enter your password to confirm."
- In Password, type your current password.
- Click Disable 2FA.
- You see "Two-factor authentication has been disabled".
Good to know
- Every click on Continue creates a new secret and a new QR code. If you click Back or close the dialog and start again, scan the new QR code. The older entry in your app will not work.
- There are no recovery codes, so keep the authenticator app safe.
- Verify & Enable stays greyed out until all 6 digits are in. If the code is wrong you see "Invalid verification code. Please try again."; wait for the next code in your app and try again. If too much time passes, the code is refused, and you may see "Current password is incorrect." even though your password is right. Click Cancel, then start again from Enable 2FA and scan the new QR code.
On the Shopify app
The Shopify app has no 2FA screen. Set it up on the web dashboard.
Related Articles
Still have questions?
Our support team is ready to help. Reach out and we'll get back to you as soon as possible.